Saturday, March 19, 2011

Girls at the gaming table. Yes, its rare...

It is rare...but it does happen! Not all of us are there to hang out with boyfreinds or anything like that. Theres alot of awkwardness that goes when a gal decides to play table top war games.

Heres the order of reactions:
1-Whoa!!! A girl!!!
2-Wheres her boy freind?!
3-Wait- no boyfreind, awww shit, one of the card game kids moms!!
4-OMG shes got a miniatures case!! She must just paint....
5-Ok, ok, I must now become more manly in my current game and beat this guy loudly!
6-Now Im going to go teach her how to play!!
7-She just corrected me on rules before we even deployed, jeeze, what a snooty bitch...
8-Damn she kicked my ass. Shes mean. I bet she eats puppies and kittens during the full moon.
9-Ok, I just imagined all that...Im going to just stare at her boobs and look awway before she sees me....
10- Why do I have to be playing a game with Stinky? His hygeine is worse than Nurgles and its like a chick repelling forcefield (this only applies to gamers that shower regularly....)


Yes- thats often what it feels like when a girl walks into a gaming store that she may not be well known at. Odd stares, awkward behavior and so on.

So, next time you see some girl walk in the gameshop, and shes not there by accident- keep in mind that foremost- it means shes a geek too! She knows why shes there, she knows theres likely a room full of socially impaired guys that can only communnicate coherently by rolling dice. Dont let the boobs and makeup make you forget that shes a gamer too!


Thank you XKCD for the comic and its use via a Creative Commons License! http://xkcd.com/236/

Wednesday, March 16, 2011

Ironback Spitter gone WILD!! Run away!

I haven't posted anything useful for a while- so I might as well post something retarded. Disclaimer-contains footage of natural acts with unnatural objects some people may find distrubing, or disturbingly appealing....

This is the Ironback Spitter, a Minion Warbeast from Hordes. Its sort of silly/cute in an angry mutant ninja turtle sort of way.


This- is a video of an Ironback Spitter in action. Watch out for the Spit Blast, his Ornery Animus is really working for him vs his low DEF oppponent...


Should you ever witness this act on your gaming table, first- get your damn shoes off the table- no one is so hard up for terrain they should be using their dirty shoes!! Second- make sure its your pet Ironback, and not some durty gamer grunting out his luv for some extreme sculpt miniature. And lastly, make sure to record it and post it on youtube so people can make retarded blog posts about it!

Wednesday, February 09, 2011

Toolsday! My weekly tip on gear & gadgets! Apoxie Sculpt!


Alrighty, here be one of my hopefully weekly topics where I'll be posting up stuff I have found that many gamers might not be aware of :) This was supposed to post up yesterday, but with a pesky broken rib distracting me I forgot to hit the send button!

On a few of the forums out there Ive seen an occasional elusive mention of some stuff called Apoxie Sculpt as an alternative to our old sculpting stand bys of green and grey stuff. Now- dont get me wrong- green & grey stuff are still useful and good materials, but they have thier limits and quirks. I for one cant sculpt green stuff very well at all, yet when I switched to Procreates grey stuff, I did quite well.

The foremost reason I decided to try Apoxie sculpt is its price. 15$ for a pound. The cheapest I've been able to find anything else was a year ago when I got my 300g tube of Procreate for 16$ on Ebay. One pound is 454 grams. So its a better deal all around- since the 15$ tag is the price from the manufacturer. Another appealing aspect- is the two halves come in little jars with lids that SEAL. So, unlike my unused year old grey stuff or green stuff- its not going to start getting crunchy around the edges and try to kill my fingers when getting mixed.

Its available in several colors, and gets cheaper when you buy the larger batches. For just buying a single pounds worth, the shipping hurts a bit since it starts at 11$. But at 26$ for a pound- its still cheaper than the alternatives and is a better product in general.

Now- one difference is this stuff is just a bit thicker than peanut butter. So it mixes up super super easy. I have problems with my hands sometimes, and have had times when mixing the other stuff was something I couldnt do. Not so with Apoxie, quick and easy. Downside-its stickier when freshly mixed, so I actually used gloves with it. While its freshly mixed like this and very soft- its excellent for using in press mold applications. In the picture you'll see the feildstone section and back packs- press molded! The stones were a Hirst arts mold, and the packs were an old silicone mold I had sitting around.

For actual sculpting use, you let it sit for a while before working with it- 45 minutes or so lets it firm up a bit and it loses some of the stickiness. Like green stuff you can smooth it with water and have to keep your tools a bit wet. Aves provided me a free sample of their Safety Solvent, which can be used to control the sticking and such- but water has worked fine for me so far. You can also use a light oil like olive oil. Its texture is more clay like compared to the rubbery taffy like texture of green/grey stuffs.

And the last tidbit that can be useful- is this stuff acts a bit like cured resin. When it has set up- warming it up in hot water softens it and make it pliable. So you can straighten peices, or- bend them on purpose if you want to make curved armor plates and stuff like that.

In the picture you might be wondering what the clear silicone stuff is- I'll do another post on that stuff as it deserves its own write up. Its called Oyamaru or Instamold and looks like a sort of wonder product for press molding(as the sheild shows it does work!). After I play around with it a bit more I'll make a more in depth post on it.

Oh- and before I forget- http://www.avesstudio.com/ feel free to tell them you heard about stuff from my blog. I wouldnt mind sponsoring thier banner here as I really like thier product. (And I also got some of thier mache' stuff to test out on terrain making!)

Saturday, February 05, 2011

Painting too much!

Ok, so, in my last post I made some big blah blah about posting more often....and then I go off and dont post anything I said I would O.o

And its because Ive been painting too much! Seriosuly, Ive been sorta posessed and have blown through most of my Warmachine figs.

Croes Cuthroats(8) I had one go MIA so I didnt do the full 10.
Irdian Skirmishers + UA
Alexia, 14 undead, 2 thralls
Mangler
Nomad
Talon
2 Renegades
Reinhold
Anastasia
Saxon Orrik

Coleman Stryker
Haley
Ironclad
2 Chargers
1 Lancer
mecahnic & 3 gobbers

Thats all been since my last post O.o

The only mercs I have left, 6 forge guard, a couple gun bunnies, and a unit of High shields with a UA.

Once it warms up a bit and I can do some more priming I may start on my Cryx stuff. Other than that Im waiting on some Cygnar infantry(sword knights and Stormguard).

And I should be getting some new sable brushes in today, and some weathering powders- thats if FedEx isnt retarded and can find my house(and they were here about 2 weeks ago...)

I'll get some pics up soon, I just havent felt like setting up the lights and all that ;)

And UFC will be distracting me tonight too, but I could care less abotu the Superbowl, so I can probly get alot done during that ;)

Wednesday, January 26, 2011

Magnus...Ashlynn...Pendrake...oh my!

Ive been busy attacking my unpainted masses! As per the usual disclaimer, I havent decided how to base them yet(so dont nag the basing!) and theres still some details I have to pick out.

The E-Magnus I got in a trade with the 'conversion' done on him already. I didnt feel like mangling his hand further to get the jack head pried off, so I cleaned it up as best I could. A bit too much glue had been used so theres been some detail loss on his cyber-hand. but all in all it turned out alright.

Pendrake was kinda fun, lots of contrasts in textures, cool specs and a good sculpt to work with. PP has really evolved thier level of product over the years.


And for the record, I kinda hate the Ashlynn fig. I did a minor repose on the arms so it looked less retarded. But then once I started painting....I really, really, dont like the sculpt on her face. PP- PLEASE give us a resculpt of her soon!!!

And p-Magnus, simple and fun to paint up.


Some new tricks I used on all of these, was my first foray into wet blending on the various capes. That was the biggest reason for the array of colors used, I wanted to experiment :D Also, when taking the pics, I noticed the metals were really popping out. This is because I tried mixing a drop of Vallejo Air metals in with the VMC metalics and P3 cold steel Ive been using. Really adds alot of sheen and I think its something Im going to keep doing.

All in all Im quite happy with them for a monday nights worth of painting along with 6 steelheads ^_^

Saturday, January 22, 2011

Saturday Sculpting trick- Power cables!

Ok, we've all been there- a really sweet conversion idea for some space marine- but alas, those dang expandable cable/hose bitz are missing and leave the guy looking half done!

But- worry not lads- Ive figured out a pretty simple method to make your own hoses! It takes just a few minutes of practice, and next thing you know youre looking for models to start slapping even more of those cables onto lol

First off- I made a simple little tool for this. What do you do with your old exacto hobby blades? If you said 'I save them to make my ork and chaos conversions uber 'Ardcore!!' go take your meds and get a tetanus shot.

If you answered 'I wisely save them because you never know when they might come in handy...' you are wise! Because now you need them!


What you're looking at there- is some left over blades, lined up side by side and glued together with some nifty CA glue. The more of them you have- the wider your tool will be(hence a bit faster).

Now- I dont have a way to take pics without both hands, so I cant yet get pics of the items in use. But its pretty simple.


Roll out some putty, green, grey, whatever stuff you have. Im using sculpey for this tutorial because its easy and Im lazy.

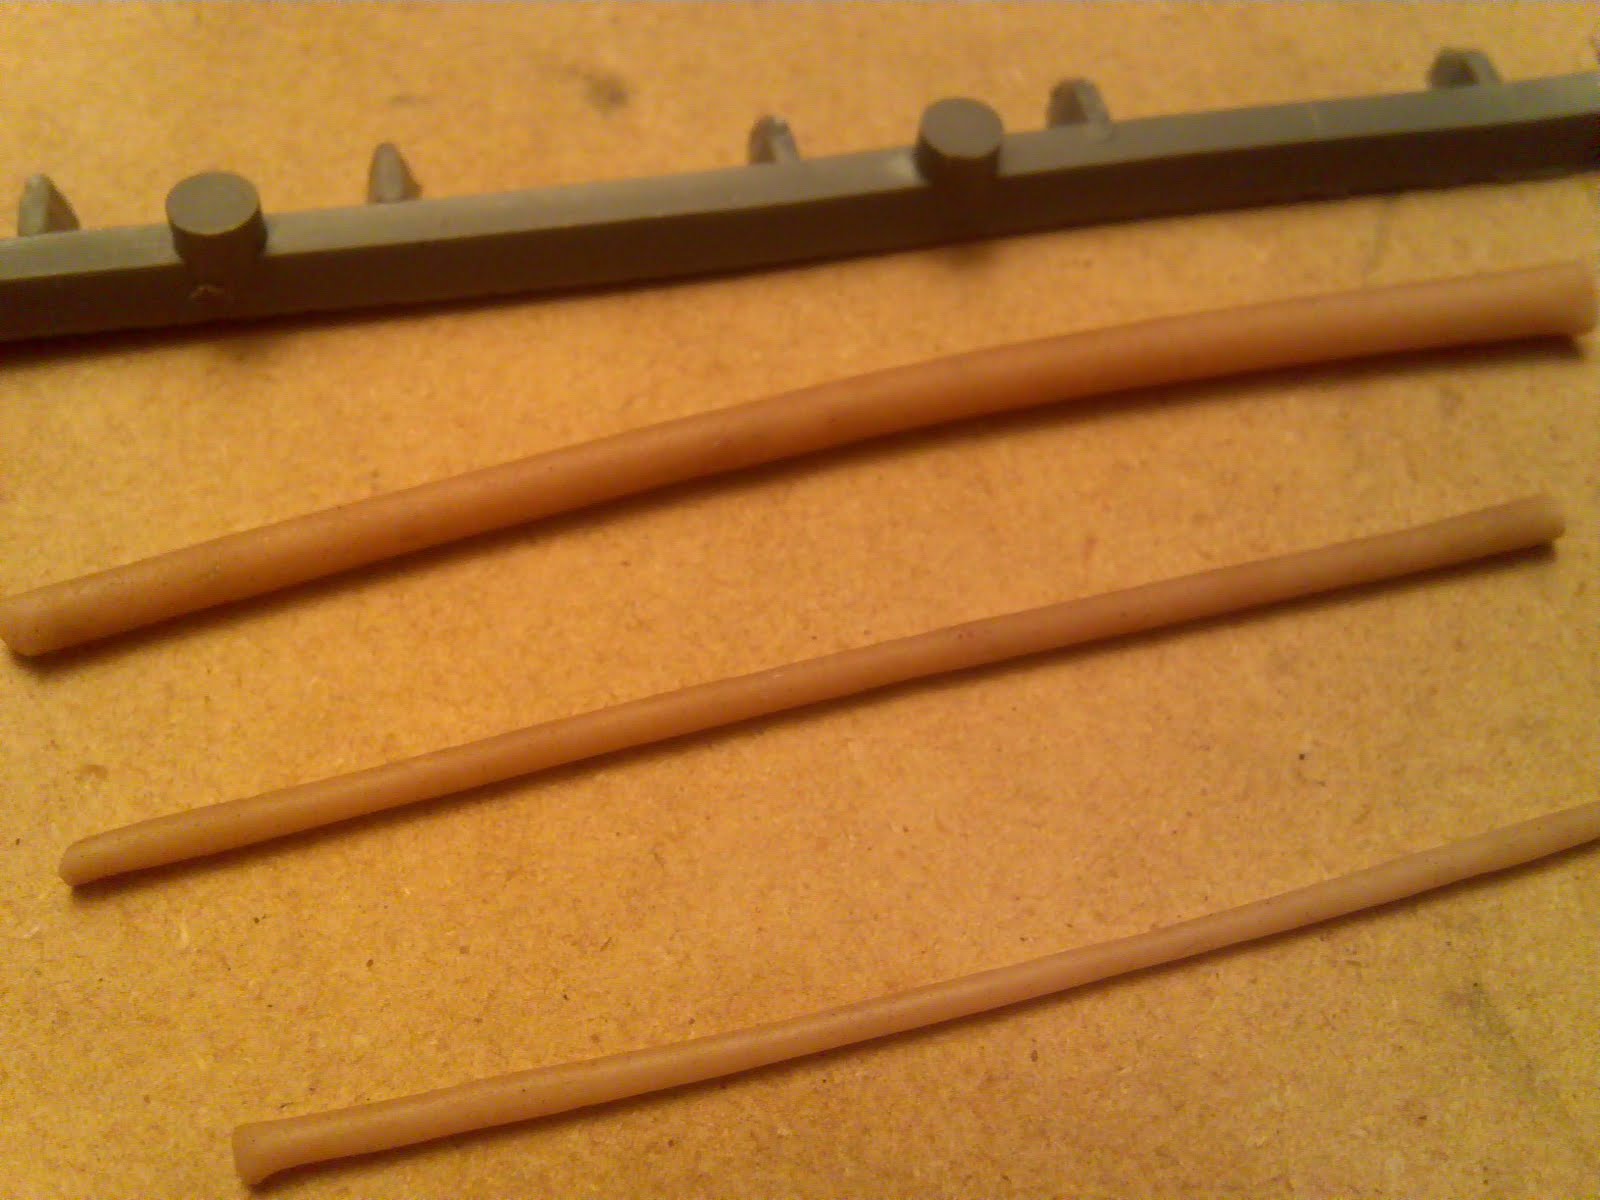
Roll it out into cylinders/rods that are just a bit bigger around than the cable you wish to make.

Now, for small cables you use the exacto-tool, the blades are closer together and make the ribbing on the cable smaller. My cam doesnt have a macro setting so this is the best pic I could get of the quick results:


I might hit that with a quick wash so the detail is more apparent- but for now thats what you get ;)

For the bigger cables, like dreadnaught sized, I use the tool I made out of old razor blades. The wider spacing on the blades works really well for this.


Now- the technique is pretty simple, and works best if you have let the putty settle in a bit so its a bit firm. Then you just gently press down with whichever tool you're using, and roll it across the putty cable. Pushing hard enough to press into the putty, but not enough to flatten the cylinder shape so it wont roll under the tool. If you want to make the ribs a bit more noticeable, after you have the grooves set into the cable, make a second roll and just pressure a bit to the side when rolling the tool.

So, the duller the blades are, the better this will work since the ridges will be more pronounced. Now, get out there and save those blades, make your cables, and show that you have the power to cable up your troops gear!

This is the first of my Saturday Sculpting tricks, it wont be the last, and I'll try to get one out every week or two. And if youre lucky maybe even weekly ^_^

Let me know what you think- or if you have an easier/cheaper way to make these cables!

Friday, January 21, 2011

New weekly features ahead!

So, now that it only takes me a few minutes of minimal effort to get pics posted up Ive decided I can get some weekly articles up.

Ive been doing this hobby & gaming thing for a long time, and even with the plethora of great blogs out there- I still dont see alot of things I do covered. So, maybe sharing the way I do things can help some people out or give them a light bulb moment of their own :)

The first thing Im going to do- is a tool post. Im going to grab some generally obscure piece of gear outta my kit and tell you all about why I think its worth the money, how I use it, and some basic safety(but Im not extensive source for safety matters- so any missing digits or limbs are not my fault!). Depending on the response to a particualr item, a full blown tutorial may follow :)

The next feature- is Going Green! I've been doing my modeling a certain way for so long, I never noticed that most of the stuff I use is sort of recycled in some form. So, since people like saving money some of my ideas might help pinch the pennies needed for that squad or warjack you've been wanting :)

At random intervals I'll drop in a sculpting tidbit since I have some tricks I havent seen posted elsewhere. And if anyone likes a particular way I paint something I may be convinced to do a tutorial of some sort.

And, like other blogs, Im considering some random give aways. Probly when I hit certain levels of membership and if I get enough responses & comments to keep me motivated ^_^